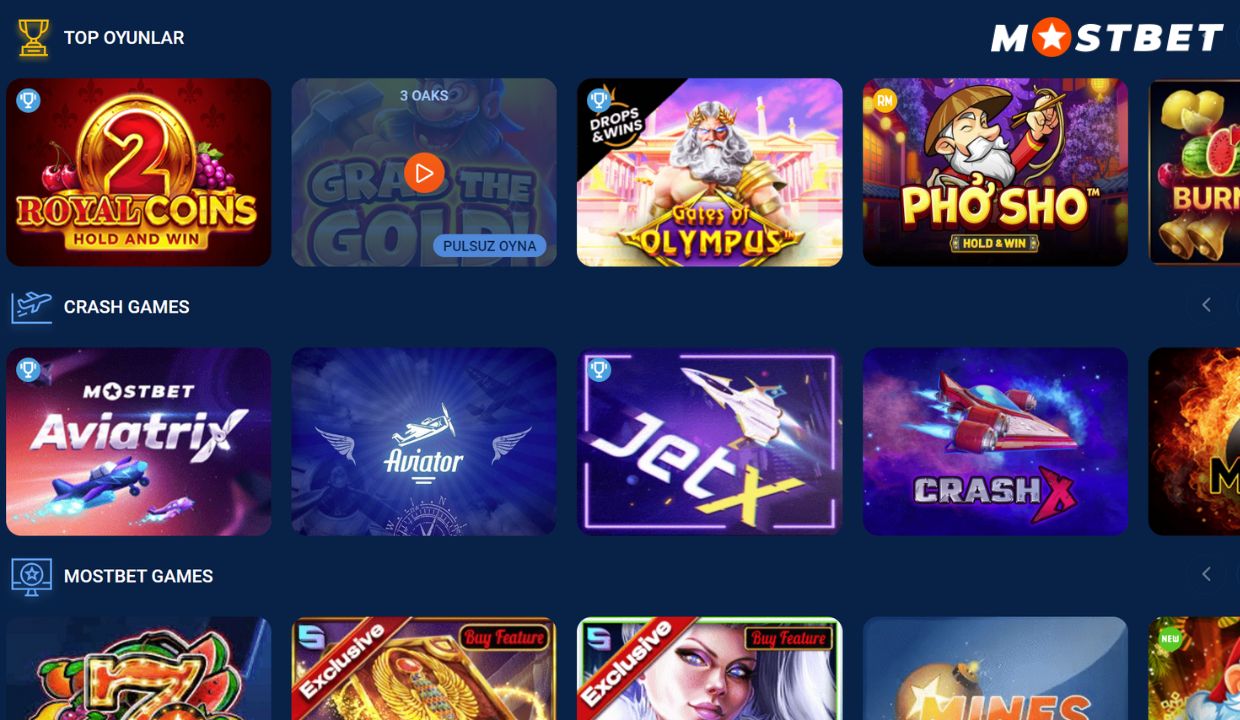
Creating a Custom Control with NSView

AsimoControl.jpg

This tutorial is about implementing a custom control class. The goal is not to explain how to subclass NSControl or NSCell, but how to think more generally about controls, what they are and how to implement one with an NSView subclass. As with the last tutorial, it will be most useful if you download the example project and follow along in the source code. The comments will provide the implementation details. It’s also fun to give Asimo a pompadour.

The tutorial is based on a similar presentation that I gave at a New York City CocoaHeads meeting a few months ago.

What is a Control?

A control is an interface element that allows users to manipulate data in an application. It’s main responsibilities are to draw itself, handle events, and communicate its values to other parts of the application.

Cocoa’s AppKit framework comes with several controls out of the box:

Picture 43.png
Picture 45.png
Picture 46.png

All of the controls pictured above are decedents of Cocoa’s control class, NSControl. As the documentation states, NSControl works closely with NSCell to provide the basic features of a user interface object. In most cases, you can use an AppKit control with no extra code.

Why Make a Custom Control?

With all of AppKit’s ready-made controls, why would you need to implement your own? Here are two situations where the Cocoa control classes are not a good choice for your interface:

1. None of the AppKit controls support the interaction model you want to implement

Take Photoshop’s curves interface as an example. This interface requires that the user is able to add control points to a bezier curve. They must then be able to select the control points and drag them around to adjust the values of the curve. If they click on the pencil button, the interface must switch to a mode that lets them draw the curve directly into the view.

PSCurves.jpg

You’re not going to find an out of the box control that supports this interface in AppKit and NSControl may not be an appropriate place to start your custom implementation. If you look at its API, it is clear that NSControl was designed to create the AppKit controls. They all have fairly straightforward drawing, event handling and target/action needs. Point-and-click. If you were to use NSControl as a starting point for this interface, you would need to create a few custom cell classes that you would manage in your control’s custom cell. At this point, you’re asking for a headache. This interface is not what NSControl was designed for. You’re going to spend more time fighting with the framework than implementing your ideas.

2. You are drawing with OpenGL instead of Quartz

Picture 53(2).tiff

All of the controls in the iTunes Cover Flow interface are drawn with OpenGL textures. That includes the buttons, scrollbar and slider. These are absolutely not NSControls, which can only draw in a Quartz graphics context. If you want users to interact with your NSOpenGL view, you’re going to have to start from scratch with your controls. Don’t let this scare you away from using OpenGL views for your interface. They’re fast fast fast and if your app is displaying lots and lots of images, especially in a full screen situation with animation, they’re the way to go.

Leopard’s LayerKit (Core Animation Layers) technology advertises mixed Quartz and OpenGL drawing, but I just have a hard time getting behind that idea. More on this thought another time.

Using NSView

The subject of creating controls for an OpenGL view is a little out of the scope of this tutorial. Again, I will come back to the issue of OpenGL views in the not-too-distant future.

Working with NSView will let us touch on the very basics of what we need to make a control. For really specialized, one-off interfaces that you can add to your window’s view hierarchy with no fuss, it makes a lot of sense to start here.

As I mentioned before, there are three parts to a control. Let’s make a to-do list for our class design. Our view must be able to handle:

  1. Drawing
  2. Event Handling
  3. Communication with other parts of your app

We’ll handle number one with NSView and number two with its superclass, NSResponder. For number three, we’ll use Cocoa bindings.

What Are we Controlling?

Before we subclass anything, we need to figure out what our control will control. The example project contains a control for adjusting the values of a twirl distortion CoreImage filter. To start the design, I looked at the documentation for CITwirlDistortion. It lists the three attributes of the filter: center postition, radius and angle. I decided to create a circular design for controling all three attributes at once. This seemed to be a nicer interface than providing three sliders. Of course this design has some usability issues that will be obvious once you play around with it a bit, but it’s fun to experiment.

KDTwirlDistortionControl has this design:

conrolDiagram.jpg

It’s basically a circle. Users can drag on the main gray part of the circle to adjust its radius - this will change the radius attribute of the filter. Dragging on the blue center point will change the position of the circle and the center position attribute of the filter. Finally, dragging the small black circle around its perimeter will adjust the angle attribute of the filter.

We have an interface design. Time for code.

Defining the NSView subclass

Our NSView subclass, KDTwirlDistortionControl, needs to keep track of three rectangles (pictured in the diagram) that it will use for drawing and hit detection. These rectangles will also be used to calculate the adjustment values of the filter. It declares the following ivars for the rectangles in the header file:

// drawing and hit detection
NSRect	mPositionControlRect;
NSRect	mAngleControlRect;
NSRect	mRadiusControlRect;

The control also contains 4 float values that can be bound to. It does this by declaring the following ivars and their getters and setters:

// the values we bind to
float	mPositionX;	// a value between 0 and 1
float	mPositionY;	// a value between 0 and 1
float	mRadius;	// a value between 0 and 1
float	mAngle;		// a value between 0 and 6 radians

The getters and setters will always return normalized values for these ivars, which are calculated based on the positions and sizes of the rectangles in the view’s coordinate system. Look in the code for more details about this part of the implementation.

With the getters and setters in place, our control can communicate changes to these values to other classes with no more code. We can check number three off of our to-do list. Thanks Cocoa.

The last thing our control needs to manage is its state. There are four possible states in our design:

  1. the control is inactive
  2. the position rectangle is active
  3. the radius rectangle is active
  4. the angle rectangle is active

We’ll use this information when we draw to give the user feedback about what they are adjusting. We’ll also use it in our mouse drag handler so that we know which rectangle the user is adjusting. To define the states of the control, create an enum type like this:

typedef enum
{
	kKDTwirlDistortionControlState_Inactive = 0,
	kKDTwirlDistortionControlState_AngleControlActive,
	kKDTwirlDistortionControlState_RadiusControlActive,
	kKDTwirlDistortionControlState_PositionControlActive

}KDTwirlDistortionControlState;

The view subclass declares an ivar that it will use to keep track of its current state:

// state
KDTwirlDistortionControlState		mControlState;

This is all the data we need for our control. Now we will use NSView’s drawing and NSResponder’s event handler methods to implement the control.

Drawing

All we need to do to draw in an NSView subclass is to override the following NSView method:

- (void)drawRect:(NSRect)theRect;

To keep things organized, KDTwirlDistortionControl uses separate drawing methods for each part of the control. It also creates a separate method to lay out the rectangles in the view. It declares them as private methods in a category in the .m file:

@interface KDTwirlDistortionControl (Private)
- (void)drawPositionControlInContext:(CGContextRef)theContext;
- (void)drawAngleControlInContext:(CGContextRef)theContext;
- (void)drawRadiusControlInContext:(CGContextRef)theContext;
- (void)layoutControls;
@end

KDTwirlDistortionControl’s drawRect method looks like this:

- (void)drawRect:(NSRect)theRect
{
 CGContextRef aCGContextRef = [[NSGraphicsContext currentContext] graphicsPort];

 // draw the background
 CGContextSetRGBFillColor(aCGContextRef, 0.8, 0.8, 0.8, 1.0);
 CGRect aCGBackgroundRect = *((CGRect*)&theRect);
 CGContextFillRect(aCGContextRef, aCGBackgroundRect);

 // layout the controls
 [self layoutControls];

 // draw the radius control rect
 [self drawRadiusControlInContext:aCGContextRef];

 // draw the position control rect
 [self drawPositionControlInContext:aCGContextRef];

 // draw the angle control rect
 [self drawAngleControlInContext:aCGContextRef];
}

If you look at the draw methods, you’ll notice that before they draw, they check the control state ivar to determine what color they will use to draw. This gives the user feedback about the state of the control. You might also notice that the control uses Quartz2D drawing commands. Your control could just as well use Cocoa’s NSBezierPath class to draw itself. It’s good to be familiar with both drawing APIs. There might be cases where you will notice the performance difference, so it’s nice to be able to fall back on Quartz for drawing straight into the view instead of using another object.

We can check number 1 off of our to-do list. The drawing is finished. One more.

Event Handling

NSView is a subclass of NSResponder. The mechanism of the view hierarchy ensures that any view you add to it will be placed in the application’s “Responder Chain”. The window will use the view hierarchy to deliver mouse events to the view that the user clicked on. Keyboard events will be delivered through the responder chain. It’s up to the view to implement the NSResponder event handlers that it is interested in.

Most mouse events will be sent automatically to the appropriate view, but there is one step that a view must take to receive keyboard events. The keyboard events go to the “firstResponder” first and then travel through the responder chain. If your view is to receive keyboard events it must accept first responder status. To do this, the view needs to override the NSResponder method:

- (BOOL)acceptsFirstResponder

to return YES. By default it returns NO.

Here’s a list of the most common mouse event handlers that a custom view can impelment:

- (void)mouseDown:(NSEvent*)theEvent;
- (void)mouseDragged:(NSEvent*)theEvent;
- (void)mouseUp:(NSEvent*)theEvent;
- (void)mouseMoved:(NSEvent*)theEvent;
- (void)mouseEntered:(NSEvent*)theEvent;
- (void)mouseExited:(NSEvent*)theEvent;

And common keyboard event handlers:

- (void)keyDown:(NSEvent*)theEvent;
- (void)keyUp:(NSEvent*)theEvent;

NSEvent

All of the event methods are going to pass us an NSEvent object that describes the event. If it’s a mouse event, we can ask the event for the location of the mouse point using the NSEvent method:

- (NSPoint)locationInWindow;

This is going to give us the location of the mouse event in the window (duh). We need to convert this point to a coordinate in our view’s internal coordinate system. We’ll use NSView’s method

- (NSPoint)convertPoint:(NSPoint)thePoint fromView:(NSView*)theView;

If the event is a keyboard event, we can ask the NSEvent object for a string of characters associated with the event with the following methods:

- (NSString *)charactersIgnoringModifiers;
- (NSString *)characters;

Another useful bit of information we can get from NSEvent is whether or not a modifier key is associated with the event. Use the method

- (unsigned int)modifierFlags

to get the current modifier flags, which you can find documented in the list of NSEvent’s constants. Check this against the modifier flag you are looking for. This bit of code is checking for the command key:

if(([theEvent modifierFlags] & NSCommandKeyMask) != 0)
{
 // do something special
}

Check the NSEvent documentation for more information on getting neat things like tablet data.

Ok, Let’s get back to our control.

Mouse Down

When our view receives a mouse down, we want to check to see if the mouse point is inside any of the rectangles. There’s a handy function we can use to check a point struct against a rectangle struct:

BOOL NSPointInRect(NSPoint thePoint, NSRect theRect);

KDTwirlDistortionControl’s mouse down method checks all of the rects against the mouse point. If it determines that a click has occured inside any of its rects, it sets the control state to indicate which rectangle has been hit, tells itself to redraw and returns. Here’s an excerpt:

// down on the position control rect
if(NSPointInRect(aMousePoint,mPositionControlRect))
{
 mControlState = kKDTwirlDistortionControlState_PositionControlActive;
 [self setNeedsDisplay:YES];
 return;
}

If none of the rectangles have been hit, the view centers the position rectangle around the mouse point. This lets user click the background to set the position - hint: this feature comes in handy if you happen to drag it to an unusable position, like I said there are problems in this design ; )

Mouse Dragged

This might be the most important method our class implements. The mouse drag is going to change the values of our active rectangle. It’s also going to call the setter methods of our control’s float values, which will automatically trigger notification of a value change to any class that is bound to the control.

The first thing the mouse dragged handler does is check the control state to determine which rectangle the user is adjusting. It will then perform the calculations it needs to make adjustments to both the rectangle and the associated filter value. It sets the value, tells itself to redraw and returns. Here’s an excerpt:

// dragging the position control rect
if(mControlState == kKDTwirlDistortionControlState_PositionControlActive)
{
 // center the rect around the mouse point
 float aNewXPosition = aMousePoint.x-mPositionControlRect.size.width*.5;
 float aNewYPosition = aMousePoint.y-mPositionControlRect.size.height*.5;
 mPositionControlRect.origin = NSMakePoint(aNewXPosition, aNewYPosition);

 [self setPositionX:aNewXPosition];
 [self setPositionY:aNewYPosition];
 [self setNeedsDisplay:YES];

 return;
}

Mouse Up

The mouse up simply sets the control state to be inactive and tells itself to redraw.

Key Down and Key Up

The key down event handler looks for arrow key presses. When an arrow key is pressed, it adjusts the origin of the position rectangle a few points in the appropriate direction. It also sets the current control state so that the position rectangle is active and redraws. Here’s an excerpt from the method. It uses a switch statement to find the arrow keys:

case NSUpArrowFunctionKey:
   mControlState = kKDTwirlDistortionControlState_PositionControlActive;
   mPositionControlRect.origin.y = mPositionControlRect.origin.y+5;
   [self setPositionY:mPositionControlRect.origin.y];
   [self setNeedsDisplay:YES];
break;

The key up method also checks for arrow keys. If the event is from one of the arrow keys, it resets the control state to inactive and redraws.

Event handling was the last thing on our to-do list. Scratch it off, we’re done. We have a control.

Hi Asimo! Nice Hair-do!

Picture 21.png

The KDTwirlDistortionControl example is very specific to the kind of data it is controlling and it could be used with any Core Image filter that has the same attributes, despite its name.

In a future post, I will explore ways to abstract the design a little more to make the control more useful in more situations. This will be necessary for designing OpenGL controls and could be useful if you’re using CALayers as the basis for a control. I haven’t had a chance to work with CALayers, but I notice that they’re not descendants of NSResponder. Odd for such a view-like class.

Resources

The Example Project

Cocoa Event handling Guide

The Responder Chain

Cocoa drawing guide

Quartz2D Programming Guide

NSView - Working With the View Hierarchy

Cocoa Bindings

More advanced bindings examples: mmalc’s bindings examples, look at graphics bindings

Tags: , , , , , , ,

18 Responses to “Creating a Custom Control with NSView”

  1. Justin Williams Says:

    This is quickly becoming one of my favorite blogs. I wish more developers wrote in-depth content like this. Keep up the good work.

  2. Cathy Says:

    Justin - thanks, that means a lot. : )

  3. n[ate]vw Says:

    > “It is clear that NSControl was designed to create the AppKit controls”

    Thank you for pointing this out. I spent a while reading and rereading the Cell/Control documentation, and was having a lot of trouble figuring out why I wouldn’t just subclass NSView directly. This encourages me that I made the right decision.

    Looking forward to more in depth perspectives/critiques of the Cocoa frameworks. They’re helpful as I try to sort out the good from the vestigial while attaching my own architectures on top!

  4. Cathy Says:

    >”I spent a while reading and rereading the Cell/Control documentation, and was having a lot of trouble figuring out why I wouldn’t just subclass NSView directly.”

    I know the feeling very well. : )

    For a long time I felt like I was missing something about the NSCell/NSControl design. It always seemed easier to subclass NSView to accomplish my goals, but in the back of my mind I thought that I must be doing something wrong.

    Then I made myself use NSCell subclasses to customize an NSControl and I found that the amount of code I wrote was pretty much the same but that the way I had to structure it was a bit convoluted and counterintuitive. I really had to force it to work. There’s no reason to go though all of that when NSView hands you everything you need in a very straightforward and intuitive way.

  5. Peter Hosey Says:

    The main reason (that I know of) to use NSCell is if you want to put it in a table view or matrix. Until that need arises, I agree: just use NSView.

  6. Brian Says:

    How do you get it to trigger an Action Method. It won’t allow me to draw a connection in IB meaning I can’t get it to communicate with my appcontroller.

  7. Cathy Says:

    Hi Brian,

    There is no “target/action” mechnaism in this example control. Remember that the class KDTwirlDistortionControl is not a subclass of NSControl, but NSView, so it doesn’t get some of the built in conveniences that you might be used to.

    If you look in the .m file for the KDAppController class, you’ll see that in the awakeFromNib implementation, the controller binds the view to the control in code. That’s how the view and the control communicate.

    Your own app controller could create an outlet for an KDTwirlDistortionControl instance, hook it up in IB, then use the same binding code to bind the three float values (angle, rotation, position) to any other float values it likes. It’s not as easy as dragging connections in IB, but it gets the job done.

    Good luck! Once I get up to speed on IB3, I do want to do some examples of creating plugins for custom control classes that would give you the convenience you’re seeking.

    In the mean time, this is certainly one of the disadvantages of going totally custom, but the effect is worth it, I think : )

  8. Patrick Says:

    Hi Cathy,

    Since NSControl is itself a subclass of NSView I would prefer subclassing NSControl. Using an NSCell subclass with your control is optional;not even all of Apple’s NSControls use cells, so why should we?

    Subclassing NSControl more clearly communicates the role/function of your class, not only to other coders but to the framework as well. For example, one advantage of subclassing NSControl is that it plays nicely with -[NSWindow setMovableByWindowBackground:]. When you make a window movable by its background, it stops passing drag events to NSViews, breaking your KDTwirlDistortionControl. NSControl subclasses, on the other hand, continue to receive these events. It took me quite a while to figure this out, but it does make sense when you think about it.

    If it looks like a control, and it works like a control, just subclass NSControl ;-)

    Great blog, looking forward to future installments!

  9. Cathy Says:

    Hi Patrick : )

    It is true that NSControl provides many useful convieniences. But, I didn’t choose NSControl because of the fact that it is an NSView subclass and will only draw with Quartz. As it is, I could change the example control’s super class to NSOpenGLView, replace the Core Graphics drawing code with OpenGL drawing code and it should work the same (I havn’t tested that). I want to leave the example control open to this possibility, even if I didn’t take advantage of it in this project, it’ll come in handy for an OpenGL example in the future.

  10. Patrick Says:

    Well, you could equally swap between NSControl and NSOpenGLView as superclass, as long as you don’t depend on any of the API promised by NSControl. I think there is also no requirement to override any of the NSControl methods when subclassing (although the documentation doesn’t clearly state that, I believe).

  11. Cathy Says:

    Yes, that’s true. I see what you’re saying. So you would just abandon the cell altogether and do all the same stuff I’ve done here with NSView. I’m going to try that out : )

  12. John C. Randolph Says:

    “A control is an interface element that allows users to manipulate data in an application.”

    Well, I’d state it a bit more precisely than that: in Cocoa, a control is a view that accepts user input events, and has a target, an action, and usually a cell.

    Personally, I rarely derive new UI objects directly from NSControl, because it’s one of those AppKit classes that has accumulated a *lot* of cruft over the years. If I’m writing a view that is similar to an existing control, I’ll start there instead.

    One thing that really drives me up the wall about most NSControls w/r/t subclassing them, is that they have a bad habit of grabbing the whole event loop. Send [super mouseDown:], and it’s game over.

    -jcr

  13. John C. Randolph Says:

    “It always seemed easier to subclass NSView to accomplish my goals, ”

    That’s probably because it is. ;-)

    -jcr

  14. Elliott Harris Says:

    Great stuff, I’m really looking forward to your articles concerning Core Animation - I’m a big proponent having done a lot of mixed content (Quartz, Cocoa, and OpenGL) in the past, and it makes it VASTLY easier, and doesn’t seem to incur any major performance hit. Nice article. Keep it up.

  15. L Raney Says:

    Great stuff. There just isn’t enough of it out there for new Mac dev people… which is growing. I have a question, sorry– I have a multi doc app. When I create new window with custom view I get keyDown events. But if I bring into focus previous created window. keyDown goes to the old window. - yes I was a windows guy.

    Thanks
    lar

  16. J Nozzi Says:

    Cathy, this is a great post and I know I’m late to the party, but I think from a usability standpoint, your control is missing something. In the context of the CITwirlDistortion, perhaps it would be good to draw a straight grid within the perimeter of the circle, then distort *it* with CITwirlDistortion depending on the control’s setting.

    This way, there’s a distinct visual representation of the effect in real time. Intense distortion is immediately distinguished from mild as opposed to relying on the orientation of the drag handle (which gives no cue as to what’s “minimum” or “maximum”).

  17. Cathy Says:

    Hi J,

    Yeah, there are several usability problem with this control…

    Your suggestion is really good and I’ll give it a try when I get around to updating this project.

    Thanks :)

  18. HaikeRakcok Says:

    Good day, sun shines!
    There have were times of hardship when I felt unhappy missing knowledge about opportunities of getting high yields on investments. I was a dump and downright stupid person.
    I have never imagined that there weren’t any need in big starting capital.
    Nowadays, I’m happy and lucky , I begin take up real money.
    It gets down to choose a proper companion who uses your money in a right way - that is incorporate it in real deals, parts and divides the profit with me.

    You can get interested, if there are such firms? I have to tell the truth, YES, there are. Please get to know about one of them:
    http://theblogmoney.com

Leave a Reply